Monday, February 4, 2013

Baked Chicken Parmesan


*Yes, this is my image, and it was my chicken parm... delish!
Chicken Parmesan Bake

I've never been a huge fan of chicken parmesan, but this recipe has totally changed my mind. It's easy, delicious, and hearty. We decided within three bites that this recipe is a keeper. It's originally posted on the Food Wishes blog, which I highly recommend because it's awesome! Great recipes, great tutorials, and Chef John has a pleasant voice and a great sense of humour too. 

Here's the recipe... but be sure to read  the *Disclaimer* at the end... it's important if you're making this for a date! 

What you need:

1.5lbs of boneless, skinless chicken. (Could go up to 2lbs I think)
2Tbsp Olive Oil
2 Cloves garlic, crushed
Crushed chillies or hot red pepper flakes, to taste
2 C pasta sauce
1/4C chopped fresh basil
8 oz mozzarella, shredded
4 oz Parmesan, grated
1 (5 oz) package of garlic croutons*
Preheat oven to 350. 

What you do:

Grab yourself a baking pan. I used a 9x13 Pyrex dish which was fine. You know what you've got, go get it! 

Drizzle the olive oil into the pan and add the chopped garlic. Smear it all around so the garlic and oil cover the bottom of the pan. Sprinkle your hot peppers lightly across the pan, making it as spicy as you want it. 

Next, lay your cleaned and trimmed chicken breast (I used pre-cut chicken tenderloins, but whatever your preference is will work fine) on the bottom of the baking dish. I wouldn't leave much space between them... I put mine close together down the middle of the pan because I had some extra room. 
Spread your pasta sauce (we used a Classico variety) evenly over top of the chicken, making sure to cover the chicken completely. Sprinkle half of your mozzarella cheese over the pasta sauce, then half your Parm. 

Spread the croutons evenly over top of everything else, then sprinkle the rest of your mozzarella and Parmesan on top of that. Basically make everything into a big pile of Italian goodness. 

Bake for 30-40 minutes (depending on the size of your chicken breasts. Take it out, check the chicken for done-ness, then let it rest for 10 minutes before serving. If you're going to serve it over pasta, try to coordinate so that your pasta is ready when the chicken has rested for 10 minutes so it's nice and hot. 

Enjoy!

*Disclaimer: This recipe is super, super garlicky. Think about it: you're using chopped garlic in the pan, garlic croutons, and depending on the sauce you use you will probably have garlic in there as well. If it's date night, I would suggest cutting back on the garlic by using plain croutons or using a non-garlic sauce or cutting back/skipping the chopped garlic in the pan. Just a thought. 

Wicked Tex-Mex Chicken or Turkey Pasta


*yep, that's my picture... Of my dinner. ;)

Wicked Tex-Mex Chicken

I was always told not to go to the grocery store when hungry. I suppose it's sound advice; going to the grocery store hungry often leads to impulse purchases, and they're not usually healthy choices! 

However, one trip on an empty stomach inspired me to make this wicked tex-mex chicken, which has become a pasta staple in our house. 

What you need:

1 lb skinless boneless chicken or turkey, cubed
1 (16 oz) container of Garden Fresh "Jack's Special" medium salsa (the best salsa ever. If you can't get this one, any fresh-made salsa would probably work)
2.5 servings bowtie pasta
1/2 cup shredded cheese (I used Kraft Mexican four cheese)
2 T olive oil

What you do:

Set water to boil for pasta. Add pasta. Cook it. You know how this works. I try to cook the pasta simultaneously with the chicken, so everything is ready at the same time. Once your pasta is done, strain and set aside. Don't let it dry out. 

Heat oil in a frying pan on med-high heat.

Add chicken or turkey. Cook until sealed on all sides. 

Turn heat down to medium.

Add 1/2 the package of salsa. Stir with the chicken. Simmer until chicken turkey is fully cooked. 
Remove everything from heat. In a casserole dish, stir salsa and chicken or turkey together with pasta. Add half the remaining salsa from the package and stir it all together. Sprinkle with cheese. You can eat it now...
or...

...put the casserole under the broiler until the cheese starts to bubble. 
Once bubbled to your liking, remove the casserole from the heat and let it rest for 5 minutes. 
Eat it. Praise me silently (or not) throughout the meal. The great thing about this dish is that it's absolutely delish as a leftover, hot or cold. :) 

Milk & Honey Cake with Toasted Coconut Topping


*Yes, this is my image. I ate most of this cake myself. It was delicious.

Milk & Honey Cake (Toasted Honey-Coconut Topping)  

This is one of my favorite recipes to make, because it fills the whole house with this delicious baking smell... there is nothing like it. Plus, it's one of those recipes where the more you mix, the better... and I like to mix it up! 

Preheat oven to 350 degrees, and grease one 8" round pan. 

1 1/2 C flour
2 1/2 tsp baking powder
1/2 tsp salt
1/3 C sugar
1 egg
1/3 C butter (soft)
1 tsp vanilla
1/4 C honey (pick your favorite)
2/3 C milk

Combine flour, powder, salt, set aside.

Cream butter. Gradually beat in sugar and vanilla. Then beat in egg and honey. 

Add dry ingredients to creamed mixture alternately with milk, stirring lightly after each addition. 

Bake for 30-35 minutes... it should be golden, and a tester should come out totally clean. The top of your cake may crack... no biggee, you won't be able to tell anyway once you get the topping on it :).

Cool on wire rack. 

Once it's cool, transfer to  a piece of foil. 

Honey -Coconut Topping

Turn on the broiler! 

1 C flaked or shredded coconut (I use sweetened. Your call.)
1/2 C liquid honey
1 Tbsp melted butter

Combine these ingredients until thoroughly mixed.

Put a thick layer of topping on the top of the cake, then frost the sides. Or not. It's your call. 

I like to cover the top in thick frosting and then just drizzle down the sides... 

Once it's properly frosted, place your cake on a pizza pan or cookie sheet (an old crappy one). Place the cake (on the foil) on the cookie sheet and place it under the broiler. 

DO NOT. LEAVE. YOUR CAKE. I cannot say this loudly or obnoxiously enough. Watch it like a hawk. Butter and coconut brown quickly and easily and this cake is no good if it's on fire. 

Toast the topping until it is bubbling and golden brown.  Remove, and allow to cool before serving. 

You could serve this cake still warm with a dollop of fresh whip cream on it if you wanted to. Personally, I find it stands alone just fine. It's very rich and moist, and with the honey seeping through it... divine. 

CiCi's Buttercream


*not my image.
Buttercream Icing

I get a lot of requests for my buttercream icing recipe. The tricky part is, I don't really use a recipe. My mom taught me to make this delicious mixture and she never measured anything, either.

The great thing about making icing without a recipe is you get to taste it. Often. And, you can customize it to suit your palate on a given day. Sometimes I like my icing sweet enough to hurt my teeth, while other times I prefer it to be a little more on the buttery side. Sometimes if I'm making a variation, I want the "special" ingredient to stand out most of all. So it really depends.

Here are some general guidelines:

Don't bother with a mixer, you really need to hand mix this stuff. I prefer a wooden spoon.

Start with about 2 Tbsp of butter.
Add about ½ C of icing sugar*.
Mix them together well, then add about 1/8 C of milk.
Add 1/4 tsp vanilla (or more, if you're making more icing) 

That's it. You'll be able to tell by the consistency if the icing is useable in it's current form. If it looks to be about the right consistency, which can also vary by the way, the next step is to taste your icing. Do it. 

You know you want to.

If it’s too sweet, add a little more butter, or try a little more vanilla. Stir again, taste again.

If it’s too wet, add a little more sugar (and if that makes it too sweet, see above). Stir again, taste again.

If it's too dry, add a little more milk.

Keep playing with it until it seems right. Depending on how thick you make it, you can use this as a simple glaze, you can use it in an icing bag to make pretty shapes, or you can spread it on with a knife (usually my preferred method). 

Variations:

Bailey's Irish buttercream icing: Exactly the same as above, but substitute Bailey's Irish Cream for all (or some) of the milk. I like this one to taste of Bailey's, so I often make it a little thinner. 

Maple buttercream icing: Exactly the same as above, but substitute real maple syrup for all of the milk. For the love of maple, do not use table syrup for your icing. Trust me, it's not worth it. 

Chocolate buttercream icing: This is a little trickier. You start out by gently melting 2-4 squares of Baker's chocolate (the bitter kind) in a saucepan. Add your butter while it's melting, so that the chocolate won't harden as it cools. Once it's melted, or mostly melted, take the saucepan off the heat and stir, stir, stir. Add your milk (at room temperature) once the chocolate/butter mixture has cooled a little. Stir some more. 
Add your icing sugar. Stir. Check texture. Taste now. With this variation, it's important that you don't over-sugar the icing. If it gets too sweet, you definitely won't want to have to melt more chocolate, it's a pain in the arse. So once you have tasted and checked your texture, carefully add a little more of whatever you think is missing. Stir often, taste often. 

I think you get the idea. Add just about anything you think will taste good and try it. If it doesn't work out, try something else! If you make something really great, please post it here.

*icing sugar is the same as powdered sugar or confectioners sugar.

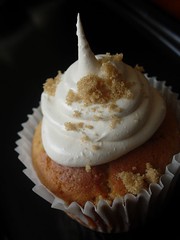
Cupcaketastic's Awesome Maple Cupcakes


*Not my image... it's Cupcaketastic's!

Delicious Maple Cupcakes

Cupcaketastic posted this awesome, delicious recipe for creamy maple syrup cupcakes. The original recipe 'Maple Walnut Delights' in Cupcakes Galore by Gail Wagman.

I don't like walnuts, so they got scrapped. I also mixed the syrup and the milk together before adding them to the batter. I don't know that this would make any appreciable difference or not. I beat the hell out of the butter and sugar, and I  mixed the batter thoroughly after each egg addition. My batter was smooth and creamy and I got 18 perfect cupcakes from this recipe. 

Please, for the love of maple, DO NOT attempt this recipe with table syrup. It's not worth it. It won't taste good. The maple flavour in this recipe is lovely; you get the scent of maple when you put the cupcake to your lips, but it's not overpowering in the cake itself. You do get a nice maple aftertaste though. Trust me, real maple syrup is the only way to go for this recipe. 

Making the cupcakes:
2 1/2 cups all-purpose flour
3 teaspoons baking powder
1/2 teaspoons salt
1/2 cup/1 stick unsalted butter, at room temp
1/2 cups brown sugar
2 eggs
1 cup real maple syrup
1/2 cup milk
1/2 cup chopped walnuts (optional)

Preheat oven to 350.

Mix flour, baking powder, and salt together and set aside.

In the large bowl of an electric mixer, cream butter and sugar until light and fluffy. Add eggs, one at a time, mixing well after each addition. Alternatively add dry ingredients and syrup and milk, blending well after each addition. (Fold in walnuts).

Spoon batter into cupcake papers, filling cups about 2/3 full. Bake for 25 - 30 minutes or until a tested into the center comes out clean. Remove from oven and cool on a wire rack.

You'll notice on Cupcaketastic's version there is a recipe for maple meringue icing. I skipped this, not being a huge fan of meringue, but if you try it please let me know how it worked out. I topped these babies with my maple buttercream instead, and sprinkled some maple flakes for looks.

Coconut Chicken Strips


*Yes, this is my (gloriously blurry) image
Baked Coconut Chicken Strips

This was a Pinterest find, and I'm glad I found it! So easy, so yummy... a great upgrade to classic chicken fingers. It was originally posted on Back To Her Roots' recipe blog. Here is what you need:

What you need:

2 large boneless, skinless chicken breasts (Or one package of pre-trimmed chicken breast tenderloins, 1 to 1.5 lbs)
3 C white flour
2 eggs
Splash of milk
Salt and Pepper
2 C each unsweetened shredded coconut and panko bread crumbs (I used coconut flakes, but I would recommend shredded if it's available.)
Oil spray (I used Pam).

Here is what you do:

Preheat oven to 400°.

If you're using whole chicken breasts, place them in a large zip-top bag and pound down to about 1/2″ thickness. Slice into 3/4″ strips.

Next grab three bowls, each larger than your chicken breast strips. 

Bowl 1: Just the flour, baby. 

Bowl 2: Whisk together eggs and splash of milk. 

Bowl 3: Mix panko and coconut in one bowl, season with salt and pepper.

Here comes the fun part! You can use any technique you like. I prefer a wet-hand / dry-hand system. 

You'll want to run your chicken through the bowls in order... first in the flour, then in the egg, and then press it into the coconut-panko mix. If you're using coconut flakes, like I did, you'll really want to press the chicken into the coconut-panko mix to get the larger flakes to stick. 

Place each strip onto a greased cookie sheet. 

Bake at 400 for 20ish minutes, flipping after 10. Let your strips rest for a few minutes before serving. 

I paired mine with President's Choice "Memories of Thailand" spicy chili dipping sauce. Unfortunately, it's only available in Canada, but if you can get it, it's worth it! If not, I think any sweet and spicy sauce would add a little zing to these yummy strips. 


My Favorite Chocolate Chip Cookies


*Yes, that's my image... of my trashed cookie book.

My Favorite Chocolate Chip Cookies

Rather than post a picture of the finished product, I thought it would be insightful to post a picture of my cookbook. Everybody has a recipe like this; when I pick up the book, it naturally falls open to the page with the Chocolate Chip Cookie recipe on it. The page is crispy, wrinkled, covered in batter and oil and other debris. The spine of the book at that spot is full of old flour and spices. That's how you know it's a great recipe. 

The cook book is called The Ultimate Cookie Book (Tormont, 1997). You can buy it here

I never follow instructions very well. Call it a character flaw or whatever you will, it's just the way I am. That said, I've only made a few minor changes to this recipe. I eliminated shortening, because why use shortening when you can use butter right!? I also use AP flour instead of cake flour, and a large egg instead of a small egg, and I drop the cookies on a cookie tray with spoons rather than pressing them out of a pastry bag... though lately, I've been rolling them into little balls and then squishing them with a fork. I hate cleaning pastry bags, so spoons or balls are a better option. It's also just faster and easier... cookies to mouth in less time = good. 

What you need:

1/3 C butter, softened. (The original recipe calls for unsalted, I use salted, you use whatever you like!)
1/4 C brown sugar, lightly packed
1/3 C granulated sugar
1 C flour (The original recipe calls for cake flour, I use AP, you use whatever you like!)
1 tsp baking powder
1/4 tsp salt
1 egg
1/2 C chocolate chips

What you do:

Preheat oven to 350F. Grease a cookie sheet... I use Pam spray, but butter adds even more buttery taste to the cookies, which is always good right?!
Using a mixer, cream butter and both sugars. Once they're nice and smooth, add the egg and blend really well.
In a separate bowl, sift together the flour, baking powder, and salt.
Using a spatula or wooden spoon, mix the dry ingredients into the wet. You can use your fingertips too, but the dough is sticky.
Once your dough is nice and smooth, add the chocolate chips and blend well. Your dough should be stiff but sticky. 

Drop the batter onto a cookie sheet using a spoon*, or roll the dough into ping-pong-sized balls and then squish them down with a fork. Bake until cookies are golden. I suggest you let them rest for a couple of minutes before eating, but not too many minutes, or your chocolate chips won't be melty and gooey.

Awesome news! This dough can be frozen! I used to buy pre-made frozen cookie dough... you know, the one in the yellow or blue package at the grocery store? I totally lack discipline, so the ability to bake only one or two cookies instead of a whole batch is a much better option for me. I will eat the whole batch if it's in my kitchen.
So anyway, I decided to try freezing my own dough to see if I could get the same results as store-bought, and guess what!? It worked perfectly! What I do is make the dough exactly as described above, then chill it in the fridge for 20 or 30 minutes to make it easier to work with. Then I wet my hands, roll the dough into a ball, and split it in half... then split those in half, and those in half, and so on until I have the number and size of cookies I will want to bake. I put them between sheets of wax paper and put them in the freezer... after 24 hours, I pop the waxed paper covered cookies into a freezer bag and voila! To bake them, just put them on a  greased cookie sheet and pop them in the oven at 350 degrees for 10 to 12 minutes. I set the timer for ten, then have a peek to make sure the centres aren't still wet... if they are, they get an extra 2 minutes. If not, I eat them immediately. Almost. :)

*Originally, the recipe calls for the cookies to be pressed out of a pastry bag fitted with a large round tube. As mentioned, I hate washing my pastry crap, so I just don't do this.... but you can!